If you have email service with Blizzard Digital and would like to set up your Android-based device to receive your email, follow this tutorial. (Instructions are based on Android version 4.4.2.)
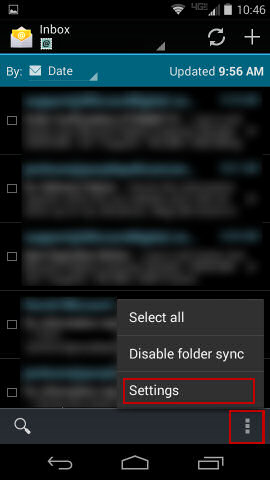
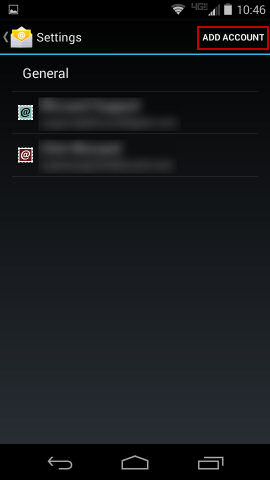
Step 1: If you already have any email accounts set up, you will first open the Email app, navigate to the Settings menu, and choose Add Account. If you’re starting fresh with no accounts, you will go straight to Step 2 as soon as you open the Email app.
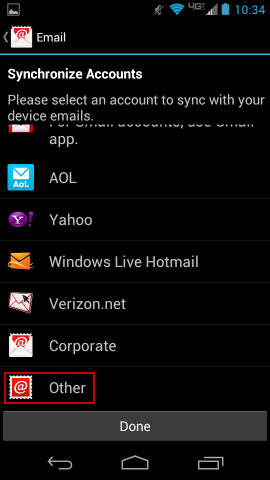
Step 2: You will be prompted to choose your email provider. Tap “Other”.
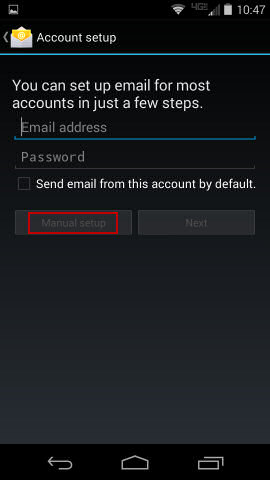
Step 3: Type in your email address and password in the provided fields, then tap “Manual setup”.
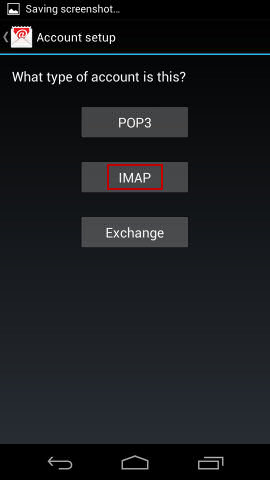
Step 4: Choose a protocol. If you don’t know the difference or it hasn’t otherwise been specified, choose IMAP.
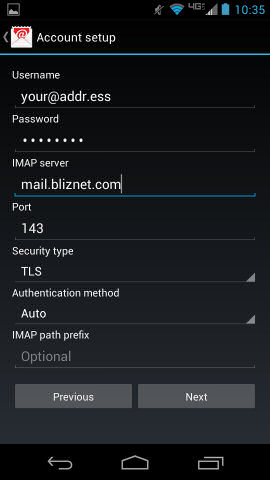
Step 5: Enter your account information. Type your full email address in the Username field. (Double and triple check that you’ve spelled it correctly and haven’t accidentally typed any extra spaces or periods!) Type your email account password in the Password field. In the IMAP server field, type “mail.bliznet.com“. Port should be filled with 143 by default, but if it isn’t, type 143. In the Security type field, select “TLS”. Authentication mode should default to “Auto”. Leave the IMAP path prefix field empty. Tap Next.
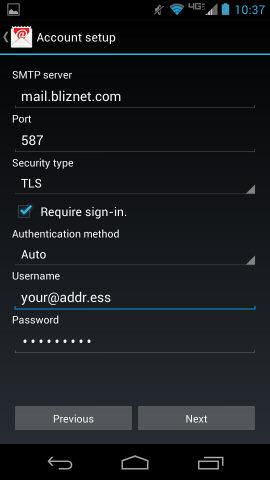
Step 6: Continue entering account information. In the SMTP server field, type “mail.bliznet.com“. In the Port field, type 587. In the Security type field, select “TLS”. Make sure there’s a check mark in the “Require sign-in” box. Authentication mode should default to “Auto”. Type your full email address in the Username field. Type your email account password in the Password field. Tap Next.
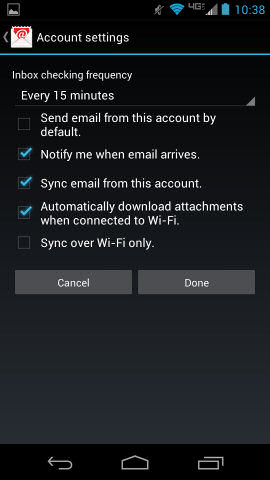
Step 7: These are extra settings for how you want your Email app to behave. If you’re not sure, simply tap Done without changing anything.
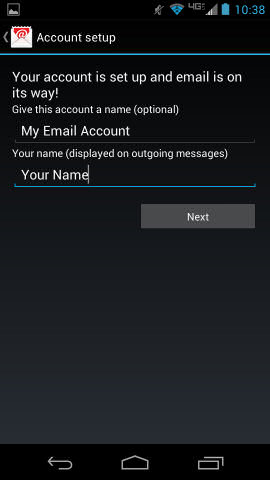
Step 8: The finishing touches! “Give this account a name” is used to differentiate accounts if you have multiple accounts set up on your phone; you can name it whatever you want, since only you will see it. “Your name” is the name that will appear on emails you send from your phone, so other people will see this. When you’re done, tap Next and you’re finished!
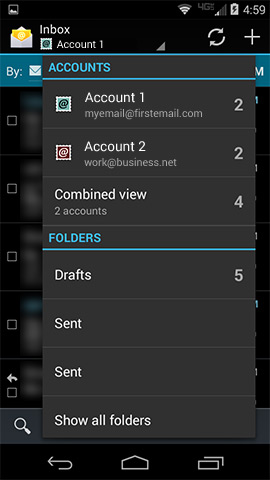
Switching Accounts
If you have several accounts configured, you may have to switch between them, or you can choose Combined View to see all of your email at once.
Step 1: In the main screen of the Email app, tap the Folder menu at the top of the screen.
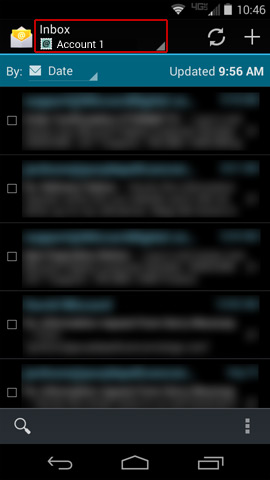
Step 2: Select which account you’d like to use, or choose “Combined view” to see all of your email in one place.