If you have email service with Blizzard Digital and would like to set up your iPhone to receive your email, follow this tutorial. (Instructions are based on iPhone 5C running iOS 7.)
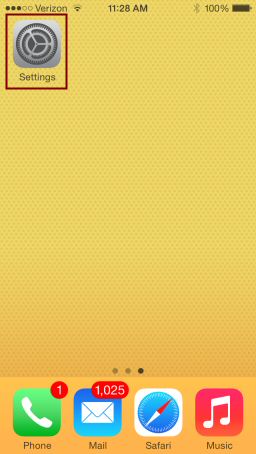
Step 1: From your home screen, tap the “Settings” icon.
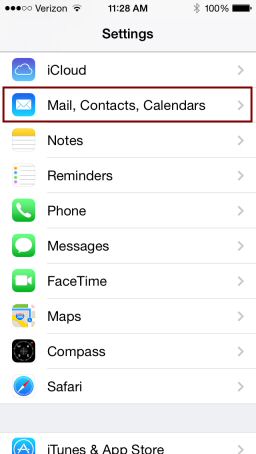
Step 2: On the “Settings” screen, scroll down and tap “Mail, Contacts, Calendars”.
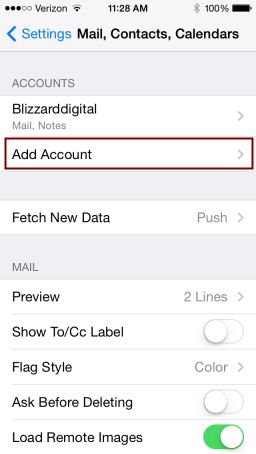
Step 3: On the “Mail, Contacts, Calendars” screen, tap “Add Account”
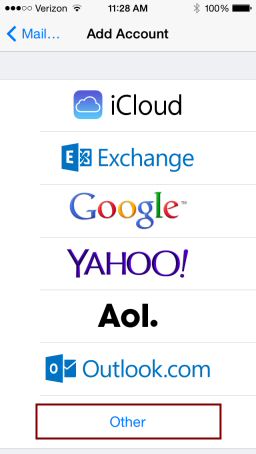
Step 4: On the “Add Account” screen, you will be prompted to choose a mail provider. Tap “Other”.
Step 5: On the following screen, tap “Add Mail Account”.

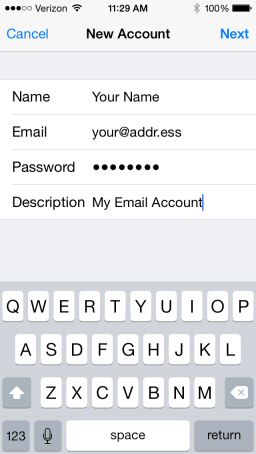
Step 6: On the “New Account” screen, enter your email account information. “Name” is the name you want people to see when they receive email from you. “Email” is your full email address. Password is your email account password. Description is the account’s name that you will see in your own email app. When finished, tap “Next” at the top right corner.
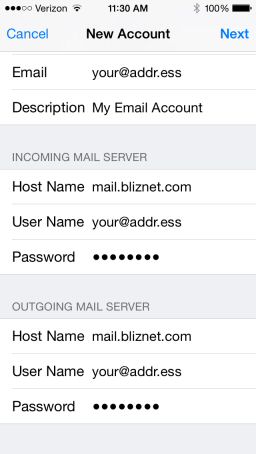
Step 7: You will be prompted to enter server information. In the “Host Name” fields (one each for “Incoming Mail Server” and “Outgoing Mail Server”), enter “mail.bliznet.com”. In the “User Name” fields (one each for “Incoming Mail Server” and “Outgoing Mail Server”) enter your full email address, and your email account password in both “Password” fields. (You may need to scroll down to see the “Outgoing Mail Server” fields — see the second screenshot below.) When you are finished entering your information, tap “Next” at the top right of the screen and you are finished!

Part 2: If you are unable to send email…
Once you have set up your account, the default outgoing mail server settings may not work for your specific situation. Here’s what to do in this case.
Step 1: From your home screen, tap the “Settings” icon.
Step 2: On the “Settings” screen, scroll down and tap “Mail, Contacts, Calendars”.
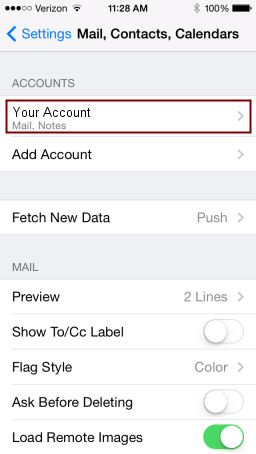
Step 3: On the “Mail, Contacts, Calendars” screen, tap the name of your email account.
Step 4: On the following screen, tap your email address.
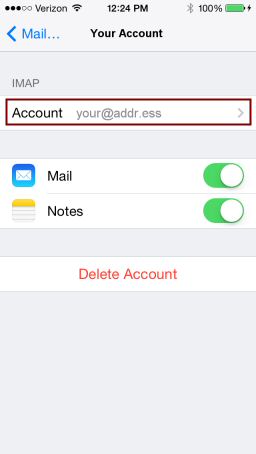
Step 5: On the following screen, scroll down to “Outgoing Mail Server” and tap “SMTP”.
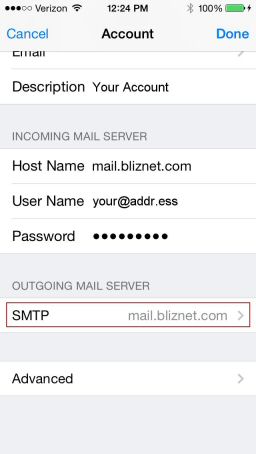
Step 6: On the following screen, tap the name of your Primary Server (should say “mail.bliznet.com”)

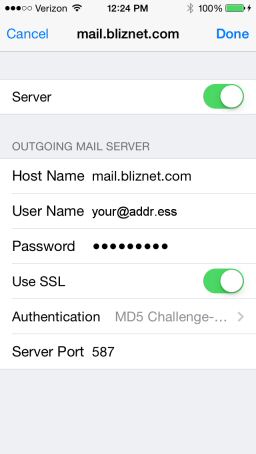
Step 7: On the following screen, verify that your User Name and Password are entered correctly and the settings are as follows:
Host Name: mail.bliznet.com
Use SSL: On (green)
Authentication: MD5 Challenge-Response
Server Port: 587
Then tap “Done” at the top right and you are finished.