To begin using your email account hosted by Blizzard Digital, you’ll need to know your email address and the password to your account, then follow these instructions.
Step 1: Open Outlook and enter the “Account Settings” screen. In Outlook 2007 and older, open the “Tools” menu and click “Account Settings”. In Outlook 2010 – 2013, open the “File” menu and click “Account Settings”. Then click the “New…” button.
Step 2: You will see the following screen:

Select “Microsoft Exchange, POP3, IMAP, or HTTP” and click “Next”.
Step 3: You will see the following screen:
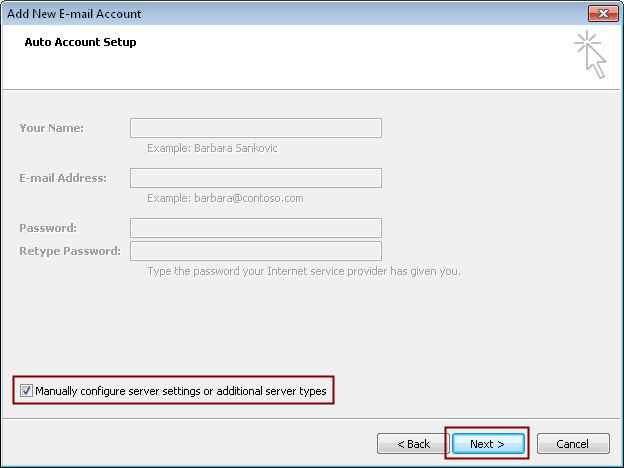
Put a check mark in “Manually configure server settings or additional server types” and click “Next”.
Step 4: You will see the following screen:
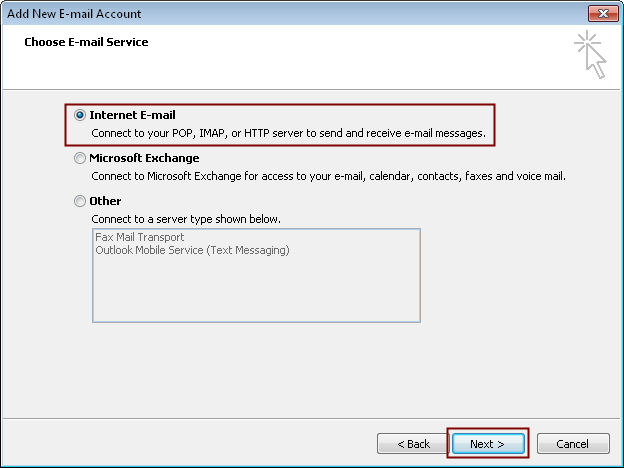
Select “Internet E-mail” and click “Next”.
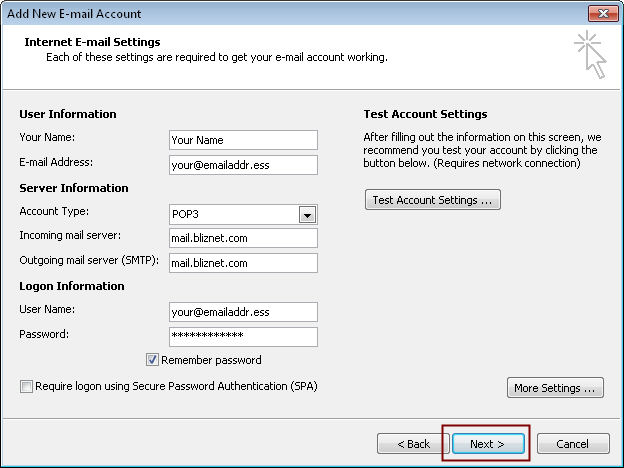
Step 5: You will see the following screen:
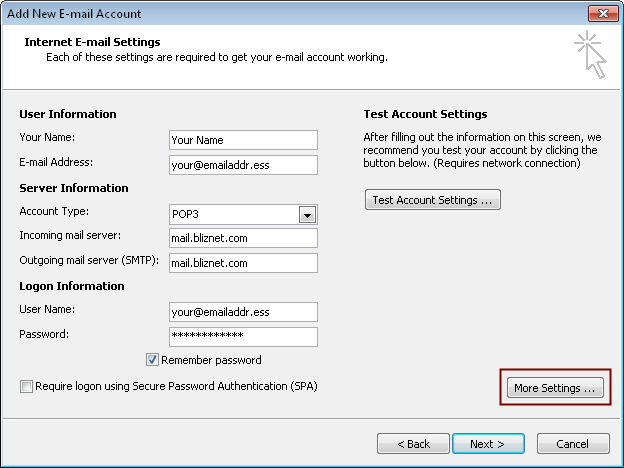
Enter the information as seen here, replacing “Your Name” with your name and “your@emailaddr.ess” with your email address. Once you have entered your information, click “More Settings”.
We DON’T recommend using IMAP in Microsoft Outlook. If you would like the benefits of IMAP, then we recommend using our web-based mail app instead of Outlook.
Step 6: On the “More Settings” screen, click the “Outgoing Server” tab. You will see the following screen:
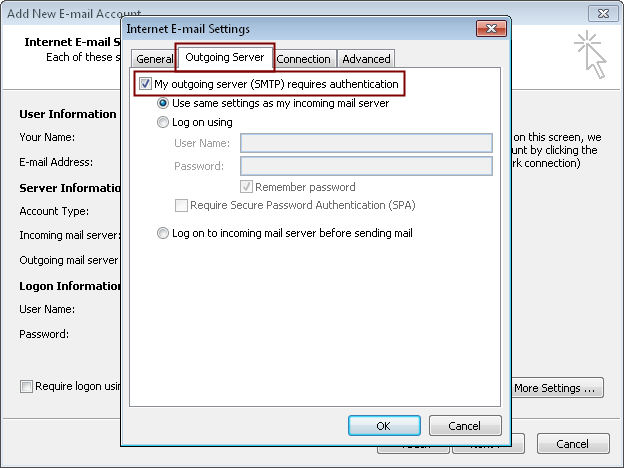
Put a check mark in “My outgoing server (SMTP) requires authentication”, then click the “Advanced” tab.
Step 7: You will see the following screen:
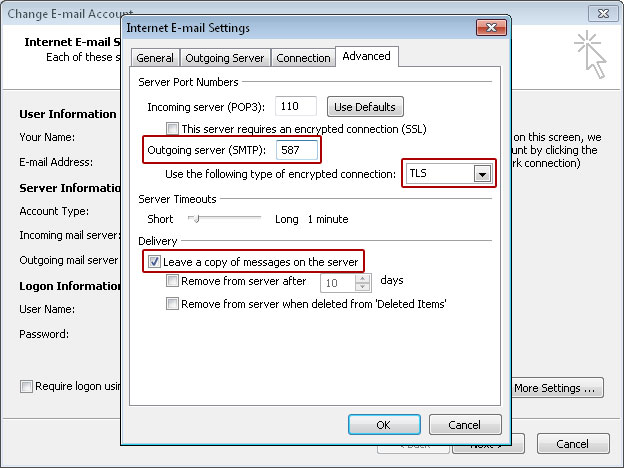
Change the “Outgoing server (SMTP):” to 587 and “Use the following type of encrypted connection:” to “TLS”. Put a check mark in “Leave a copy of messages on the server” (NOTE: If you skip this step, then other devices [e.g. smartphone or other computers] will NOT be able to receive mail that you receive in Outlook.) Click “OK”.
Step 8: You will see the following screen:
Click “Next” and then “Finish”.
You are now ready to use your email!